Since this is my first brew day blog, I'll try to be as detailed as possible in the whole brewing process just to give you an idea of what it entails... Subsequent batches might not be quite so detailed from start to finish.
Let's go back to the very beginning....
The story really begins with my Peloton Pale Ale and bottling day. What does the old have to do with the new you ask? Simple...the answer is yeast. I saw no reason to spring for a brand new yeast starter while I had a perfectly healthy colony just chillin' in the bottom of my fermenter.
Before racking to my bottling bucket, I first sterilized my Erlenmeyer flask, and boiled my starter media (3/4cup Dry Malt Extract in 1L Water). Once this was done and the media had cooled to room temperature, I proceeded with bottling the Pale Ale. I left the "trub" (the sediment and yeast cake that settles to the bottom) in the fermenter. Once I had racked all of the Pale Ale into my bottling bucket, I collected some of the Trub and transferred it to the starter media in the flask, and left it to stir (and hopefully propagate yeast) for a week. It looked like this:
 Happy little yeast cells! Yay!
Since I wasn't ready to brew after that week I stuck it in the fridge to keep it dormant until I was ready to use it. On brew day I took it out of the fridge and put it back on the stir plate first thing in the morning so it could equilibrate to room temperature and become active again.
The yeast strain started as White Labs: WLP002 English Ale Yeast. Hopefully it has stayed that way (or has mutated for the better). We shall see...
I could wax poetic about yeast for a few more paragraphs, but since I understand that the majority of the readership most likely didn't get a degree in Microbiology or Biochem, i'll continue on to the brewing.
As most of you already know beer typically consists of four basic ingredients:
1. Water (Boring)
2. Grain (usually malted barley, sometimes wheat or oats)
 Crushed Rahr 2-row Pale Malt
3. Hops
 East Kent Goldings (pellet form)
4. Yeast ( I won't bore you with that anymore)
2. Grain (usually malted barley, sometimes wheat or oats)
 Crushed Rahr 2-row Pale Malt
3. Hops
 East Kent Goldings (pellet form)
4. Yeast ( I won't bore you with that anymore)
By using different varieties and amounts of those four basic ingredients there are literally infinite possibilities for types of beer! This makes me very excite!

I like you.... I like beer!
That said... The beer I am brewing is an Imperial Porter. It's very dark, very heavy, and very high in alcohol. (about 9.5%)
The recipe looks something like this:

I like you.... I like beer!
The recipe looks something like this:
Grain:
5lbs Rahr 2-row Pale Malt
2lbs Simpson Chocolate Malt (a dark roasted barley)
2lbs Simpson Black Malt (a darker roast)
6lbs Northern Brewer Gold Liquid Malt Extract
(syrup made from barley, to help bump up my OG)
Hops
2.5oz East Kent Golding (@60min)
1.0oz East Kent Golding (@40min)
0.5oz East Kent, 0.5oz Newport (@20min)
1oz Newport (@10min)
I'll go more in-depth about the times later...
Additional Ingredients
1lb Light Brown Sugar (another fermentable for more EtOH!)
1tsp Irish Moss @15min (Helps precipitate wort proteins so they settle to the bottom...gives better clarity)
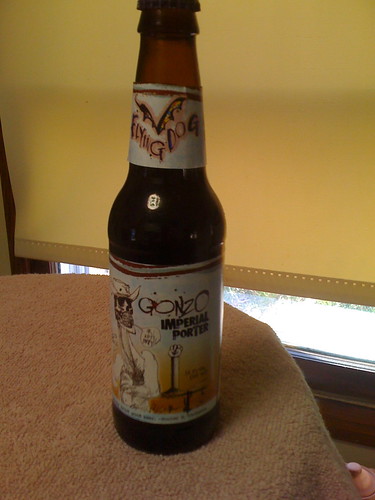
This recipe is basically my attempt at cloning one of my favorite beers from Flying Dog Brewery: Gonzo Imperial Porter.

12fl oz of AWESOME!
12fl oz of AWESOME!
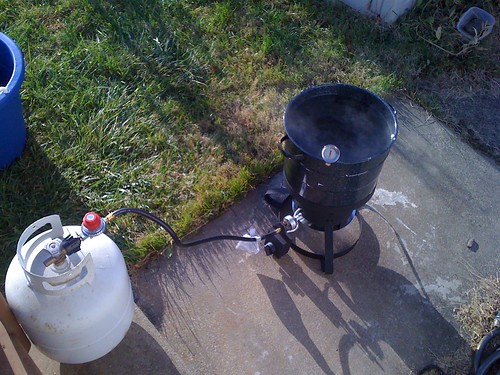
Brew day starts with the equipment really...preparing everything and making sure you have everything clean and sanitized. Here's a look at some of the equipment:
 Left: Brew Kettle (7gal capacity...a turkey fryer works great for 5 gal batches)
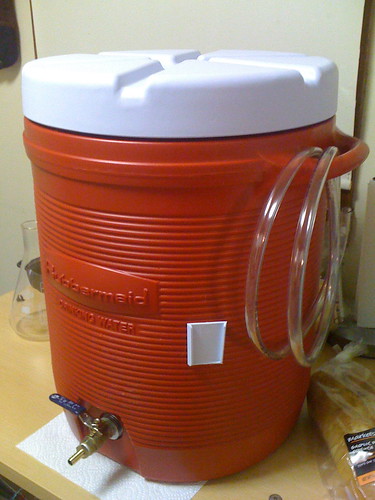
Right: My home-made Mash/Lauter Tun (for steeping the grain to create wort)
 Left: Brew Kettle (7gal capacity...a turkey fryer works great for 5 gal batches)
Right: My home-made Mash/Lauter Tun (for steeping the grain to create wort)
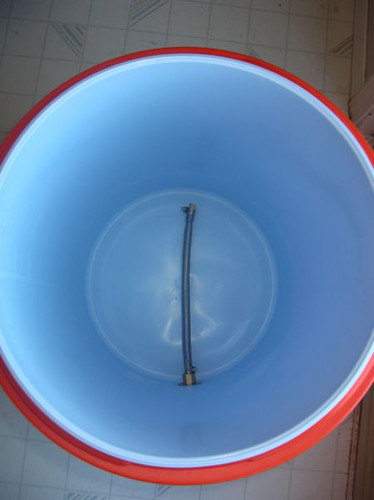
The Mash/Lauter Tun is basically just a converted 10gal beverage cooler that has the spigot replaced with brass fittings and a stainless steel mesh supply line to serve as a filter (also called a manifold). This is where you'll take all of your grain and mix it with hot water to create your wort (young beer).

A better look at the ball valve on the MLT..plus some heat-resistant tubing.
 Not mine...but same idea. The braided mesh supply line filter.
The other equipment you'll need:

Food Grade bucket, and 6 Gallon Glass Carboy
A better look at the ball valve on the MLT..plus some heat-resistant tubing.
 Not mine...but same idea. The braided mesh supply line filter.
Interested in making your own? Go HERE. Lazy or not comfortable with tools and just want to buy one? Go HERE.
Keep in mind that if you do want one it's MUCH cheaper to go to Lowe's or Home Depot and piece it together yourself.
Keep in mind that if you do want one it's MUCH cheaper to go to Lowe's or Home Depot and piece it together yourself.
The other equipment you'll need:
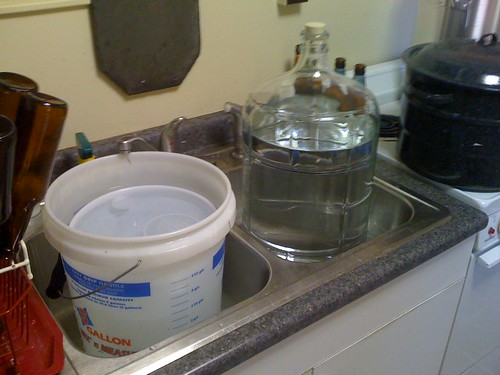
Food Grade bucket, and 6 Gallon Glass Carboy
While I'm starting the cooking I like to let anything that will touch the cooled wort sit in a dilute solution of bleach to sanitize it (this includes, carboy, hydrometer, bung, air-lock, transfer funnel). Make sure you rinse everything every very well after. Some people like to use no-rinse sanitzers, but I'm not sure I trust them to do a good job and not leave residues. I definitely trust bleach. Remember cleanliness is key!
Now that all of the equipment is ready it's time to brew!
First you heat up your mash water

Turkey fryers work great for this!
While the grains were steeping I heated up more water to sparge (rising the grain after the first draining....to extract more sugar). The quantity of water for the sparge determines the size of my batch. I want five gallons to go into the fermenter. Assuming the grain absorbs about 1 pint per pound, and that I'll lose about a gallon to evaporation during the boil, I need to compensate for that. There's calculators for this crap....I won't bore you any more than I already am.... If you're interested Go HERE.
Since heating up water doesn't exactly take a rocket scientist, I had some free time on my hands during the mash.... Time to play with my laser-cat!
Now that all of the equipment is ready it's time to brew!
First you heat up your mash water
Turkey fryers work great for this!
You don't want it boiling. The goal is to get your mash temperature to around 155 degrees Fahrenheit. This will ensure that the enzymes in the grain responsible for starch breakdown are activated and you extract as much sugar as possible from the grain. Too cold and your extraction will suffer. Too hot and you'll leech tannins and other undesirable compounds from the husks, and you'll have off flavors. If it's too hot you'll also denature (fancy science word for F*** up) the enzymes.
To reach this temperature you need to keep in mind that the grain we'll be adding to the water will cool it down a bit. Most sources will tell you that a target temperature for your "strike water" is about 165 degrees. The volume of water you use is typically 1.5 quarts per pound of grain.
Once we heat up the water to that temperature, we add it to Mash Tun....then the fun begins.
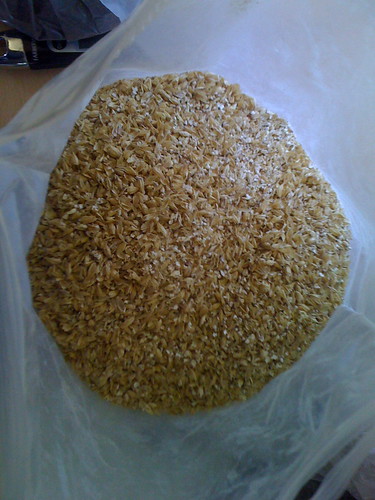
Add the grains...

The total grain bill...
 Words cannot describe how good this smells....
To reach this temperature you need to keep in mind that the grain we'll be adding to the water will cool it down a bit. Most sources will tell you that a target temperature for your "strike water" is about 165 degrees. The volume of water you use is typically 1.5 quarts per pound of grain.
Once we heat up the water to that temperature, we add it to Mash Tun....then the fun begins.
Add the grains...
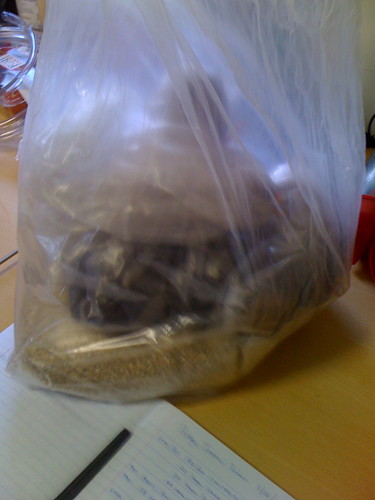
The total grain bill...
 Words cannot describe how good this smells....
After adding the grain, stir well and take a temperature reading to make sure we hit the target temp:
According to my brew log it was 148.9 degrees... a little low so I added 2 more quarts of 165 degree water. The second reading showed 154.1 degrees. Perfect!
So then we cover it up and let it sit for an hour (open it to stir every 20 min and take the temp again)

I covered it with a towel to try and keep more heat in.
According to my brew log it was 148.9 degrees... a little low so I added 2 more quarts of 165 degree water. The second reading showed 154.1 degrees. Perfect!
So then we cover it up and let it sit for an hour (open it to stir every 20 min and take the temp again)
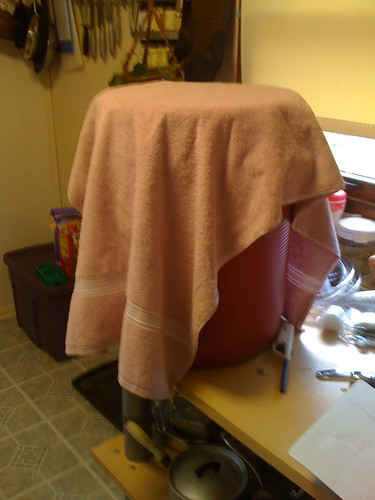
I covered it with a towel to try and keep more heat in.
Since heating up water doesn't exactly take a rocket scientist, I had some free time on my hands during the mash.... Time to play with my laser-cat!
In the future there was a nuclear war...
Because of all the radiation
Cats developed the ability to shoot lasers out of their mouths.
Some will use the cats for good...
Others for EVIL

After saving the world from evil it was time to Mash-out.... I added a small volume of boiling water to the Mash to raise the temp up to around 170 degrees. This denatures those enzymes we discussed previously and suspends the starch conversion. After Mash-out it's time to drain the wort into the brew kettle.

After draining the first volume of wort we add the sparge water...let it sit for a little bit, then drain again to get to our pre-boil volume....

Once we have everything in the kettle (at this point I added the rest of the fermentables, the malt extract and brown sugar) we put it on the burner to boil for 60min.

Once it's boiling we set the timer for 60 minutes and add the first hops. I didn't take a picture but I used mesh muslin bags sort of like large tea bags to boil the hops. (This way I could remove them at the end). I also added hops with 40 minutes, 20 minutes and 10 minutes to go. The hops at the beginning of the boil are the bittering hops. These give flavor to the beer. The closer you get to the end of the boil, the more the hop additions become about aroma. The volatile compounds contained in the hops have less chance to boil off at that point and will stay in the finished product.
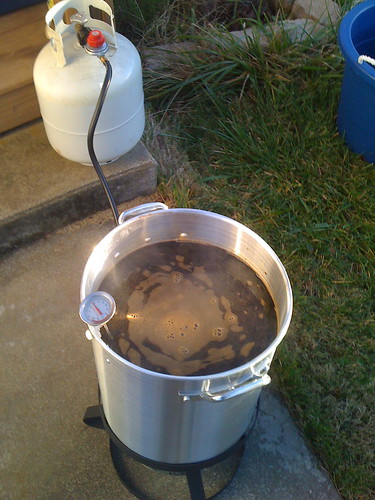
Once the boil is done we cool the wort as quickly as possible. I use an ice bath, and eventually i'll invest in a counter-current copper wort chiller like this:
 A quick chilling of the wort means less chance for contamination by environmental microbes, as well as the precipitation of proteins in the wort which will settle to the bottom. If the wort is not chilled quickly these proteins won't precipitate, and you'll get an off-flavor in the finished beer from them.
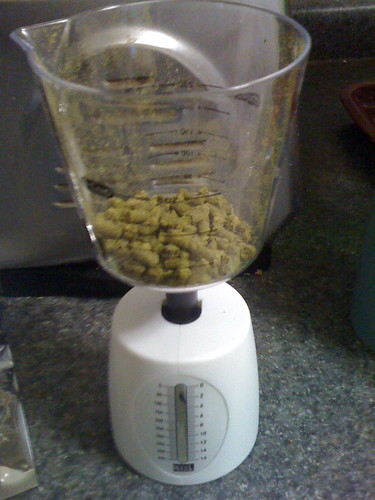
Once the wort is chilled we use the hydrometer to take a specific gravity reading. This allows us to determine how much fermentable sugar is in the wort. The Original Gravity reading (OG) when plugged into an equation with the final gravity (FG) will give you your alcohol content
That equation looks like this:
The we transfer it to the fermenter, pour the yeast starter in, seal er' up, and let er' sit.

After a few hours the yeast will get to work...and it will look like this:
So... there you have it... my WAY TOO DAMN detailed brewing blog. I promise the next ones won't be this lengthy.. for serious...
Because of all the radiation
Cats developed the ability to shoot lasers out of their mouths.
Some will use the cats for good...
Others for EVIL

After saving the world from evil it was time to Mash-out.... I added a small volume of boiling water to the Mash to raise the temp up to around 170 degrees. This denatures those enzymes we discussed previously and suspends the starch conversion. After Mash-out it's time to drain the wort into the brew kettle.
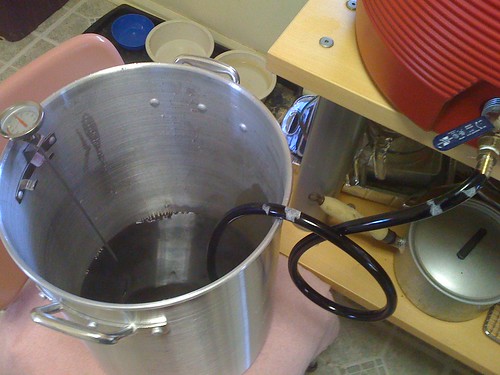
After draining the first volume of wort we add the sparge water...let it sit for a little bit, then drain again to get to our pre-boil volume....
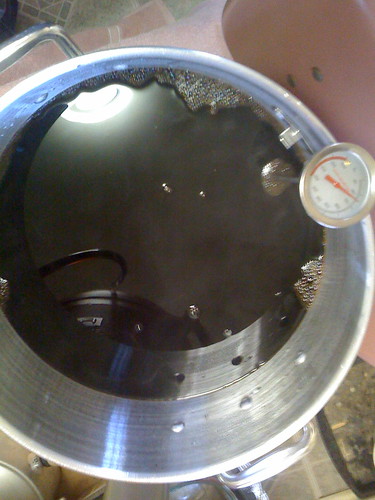
Once we have everything in the kettle (at this point I added the rest of the fermentables, the malt extract and brown sugar) we put it on the burner to boil for 60min.
Once it's boiling we set the timer for 60 minutes and add the first hops. I didn't take a picture but I used mesh muslin bags sort of like large tea bags to boil the hops. (This way I could remove them at the end). I also added hops with 40 minutes, 20 minutes and 10 minutes to go. The hops at the beginning of the boil are the bittering hops. These give flavor to the beer. The closer you get to the end of the boil, the more the hop additions become about aroma. The volatile compounds contained in the hops have less chance to boil off at that point and will stay in the finished product.
Once the boil is done we cool the wort as quickly as possible. I use an ice bath, and eventually i'll invest in a counter-current copper wort chiller like this:
 A quick chilling of the wort means less chance for contamination by environmental microbes, as well as the precipitation of proteins in the wort which will settle to the bottom. If the wort is not chilled quickly these proteins won't precipitate, and you'll get an off-flavor in the finished beer from them.
Once the wort is chilled we use the hydrometer to take a specific gravity reading. This allows us to determine how much fermentable sugar is in the wort. The Original Gravity reading (OG) when plugged into an equation with the final gravity (FG) will give you your alcohol content
That equation looks like this:
[(OG) - (FG)] x 131 = %alc
According to my brewer's log my measured OG was 1.095 (actually better than the theoretical 1.092 from my calculations at 75% efficiency).
The we transfer it to the fermenter, pour the yeast starter in, seal er' up, and let er' sit.
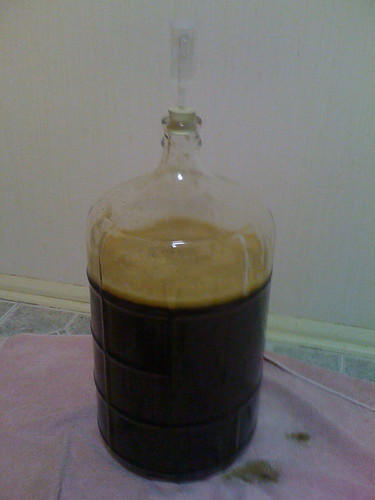
After a few hours the yeast will get to work...and it will look like this:
So... there you have it... my WAY TOO DAMN detailed brewing blog. I promise the next ones won't be this lengthy.. for serious...
Sweet, awesomeness...I love beer! Good job on the brew!!
ReplyDelete